


Add GA4 To Your WordPress Website In Just 5 Easy Steps!
Adding GA4 to your WordPress Website:
In today’s driven world marketing data or analytical programs have never been more important with over 8.5 billion searches a day having analytics on your website has never been more crucial and with GA3 being deactivated more and more people need Google Analytics we hope that this guide will help you become more knowledgable and have the data you need to drive your businesses growth.
Watch The Video Here
Contents:
- Logging into Google Analytics
- Setting up a Google Analytics Account
- Set up the Website Tracking
- Add the Google tag to your Website (Two Ways to do it so stay tuned)
- Methods of checking
Step One: Logging into Your Google Analytics Account
In order to start the process of adding your GA4 website tracking to your business website you will first need a Google Account in order to gain access to Google Analytics (sign up for a free Google account here) once you have an account head to Google Analytics and log in with the account you wish to track your site data too.

Once this has been done click start measuring.
Step Two: Setting up the Google Analytics Account:
Once you have clicked start measuring you can then start creating your analytics account and property
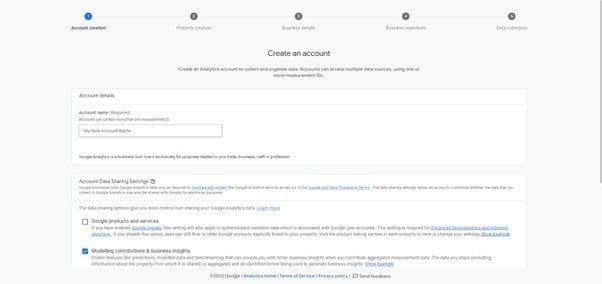
Fill in your account name (for this we recommend you use something like your business or company name so that if you make more in the future it’s easily distinguishable) and click any preferences you would like.
Step Three: Setting up your property
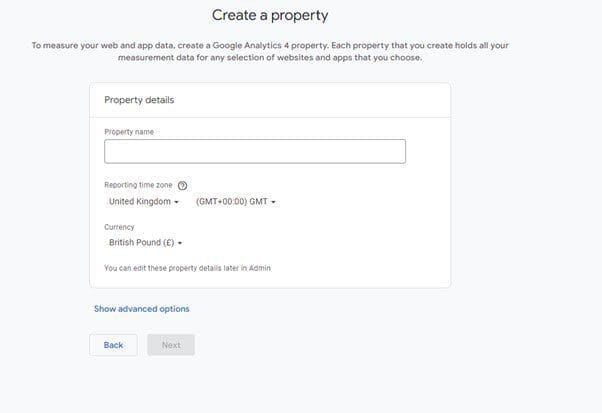
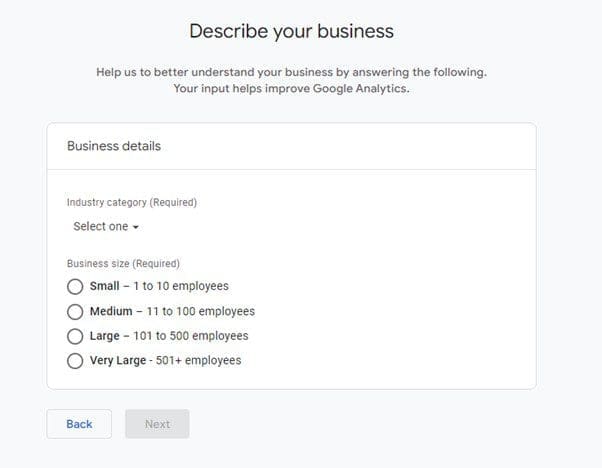
Fill in all the information in the boxes and ensure everything is correct.
Now It’s time to set your goals it’s important that you only tick these four and not the last one as only picking these gain you more data reporting opportunities and gives you (the user) more control over your analytics.

Then click Create and accept their terms and conditions.
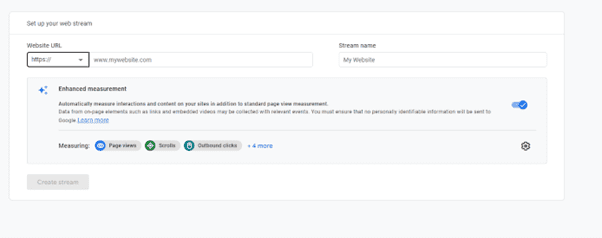
Then Choose what platform you wish to collect from and then enter your site URL (without the https://) and give it a name (again name it something easily distinguishable.
Step Four: Adding Your Google Analytics To Your WordPress Site
Before you install it on your site you will need the unique GA4 Code that you can put on every single page on your site.
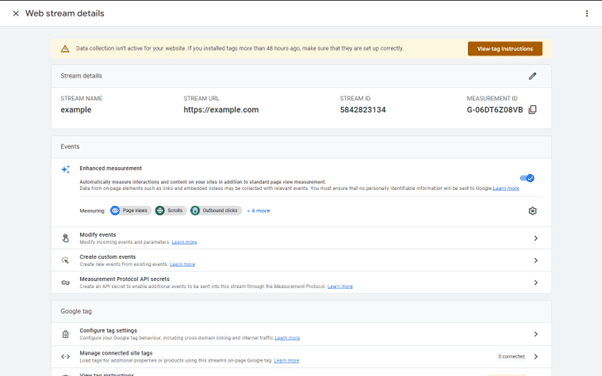
Press On “view tag instructions”
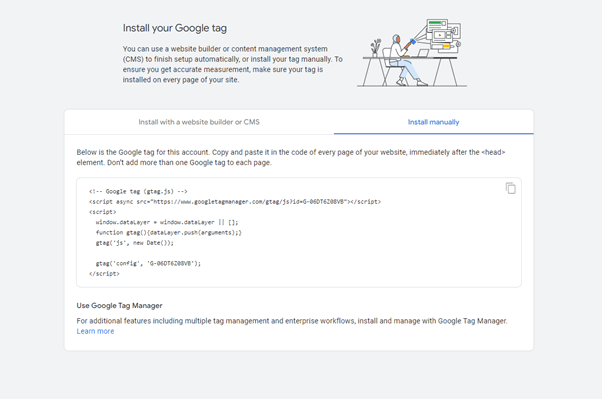
Press install manually and copy the code that it provides make sure you get all of it otherwise the tag won’t work.
Through The Appearance Menu:
Navigate to The Appearances and then Theme File Editor

on the left sidebar navigate to the header.php file
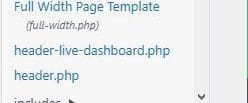
click on it and scroll down on the code until you find the </head> tag and then input the code that you copied from Google Analytics just before that tag.

The WP File Manager Way:
For this step, you need to first install the WP File Manager Plugin on your WordPress Site
Head to Plugins/Add New:

Then Search (in the Search bar on the left) WP File Manager and click Install then activate once the installation has finished.

Once this has been done navigate down the sidebar and click on the file manager plugin.

Once the plugin is open navigate to wp-content then themes and then click on the theme that is currently active (to find out what theme is currently active get to appearances and themes and you will find it there)

Now navigate till you find the header.php file again but this time right-click on it and select code editor.

Once you have opened up the code it’s the same as before copy and paste the Google Analytics code just before the head closing tag (</head>).
Step Five: Checking to see if it’s working
One way you can check to see if it works is by going back to your Google Analytics Account and seeing if it says ” Your data collection is active” This suggests that it’s just simply waiting for data to be inputted.
The Second way: Google Tag Assistant Legacy
Head over to the Google Chrome Web Store and install the Google tag assistant legacy

Then navigate to the Home page of your site click on the browser extension and click enable,

reload your site and you should see a number replacing the assistant’s smiley face. This number represents the number of active Google Tags you have on your site.
In Conclusion, the process of adding Google Analytics to your site can be done in just five simple steps, we understand how crucial marketing data can be so no amount of technical know-how should stop you from accessing that important data.
We hope that this helps you understand how to add your Google Analytics to your WordPress site if you need any more assistance don’t hesitate to contact us or email In at: [email protected].
Until Next Time Fellow Web Superheroes